After fixing my “unfixable” 2014 shoulder injury…
I’ve worked with athletes, fitness pros and advances trainees globally who:
— Were injured
— Losing muscle
— Unable to throw
— Weak and in pain
— Unable to push or pull
Here’s a glimpse into the exercises I use to get unbeatable results with clients, and how they’re different to what everyone else uses.
We’ll use one example:
I’ll show you how to do it, and I’ll explain the “why behind it”.
This is for you if you want to:
1. Rebuild strength
2. Regain muscle
3. Fix shoulder pain forever
Let’s dive in! …
The Cuffed Lateral Raise
I thought this’d be a good example because for most people with shoulder pain, shoulder abduction is problematic.
I typically introduce this exercise (and similar single joint exercises) in phase one of the program.
Why?
Because the goal here is restore shoulder mobility and strength while keeping pain symptoms as low as possible.
At this stage:
You’re not ready to perform complex multi-joint lifts.
Instead, you must start small (and slow), then gradually work your way up to harder stuff as you build your tolerance in the gym.
It’s obvious this trains the lateral deltoid. Many people forget that this exercise also directly trains Supraspinatus, too.
There are a few details to run through…
But first:
Here’s how to set up the exercise.
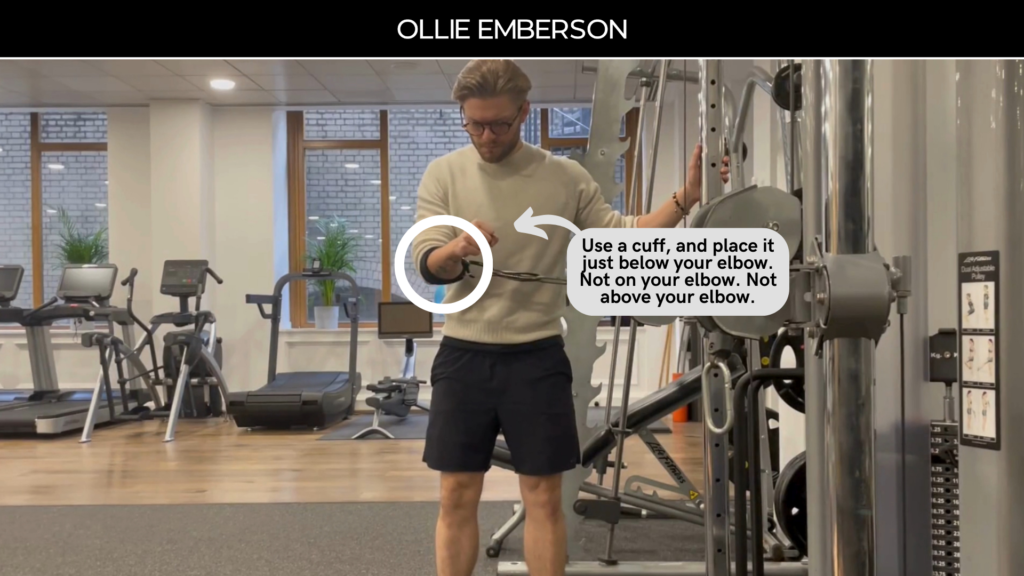
1) Use an ankle cuff just below the elbow
2) Set the cable height in line with your belly button
3) Hold onto the machine with your non-working arm
These instructions are essential, because they’ll help you minimise pain and maximise how effective the exercise is.
Let me explain…
Why The Cable?
During a lateral raise, you are strongest at the bottom, and weakest at the top.
So ideally:
You want the exercise to drop off and get lighter where you’re weakest and most sensitive to pain in that top position.
Otherwise?
You’ll get pain every time you lift, and this pain will act as a barrier — because it will stop you progressively lifting heavier.
The solution?
Use cables 👇

With cables set up at around belly button height, the exercise is heaviest at the bottom (where you’re strongest), but it gets lighter in that sensitive painful end range where you’re weakest.

“What about dumbbells or bands?”
Unfortunately, they do the opposite. As you raise the dumbbells, they get heavier (because you’re working against gravity).
And as for bands?
Band resistance increases as you stretch them, which means it’d get heavier towards the top again.
Both are poor options:
And this lack of understanding and poor choice of equipment is often why physical therapy programs fail so many people.
Why The Cuff?

We use cuffs in phase 1 for a few reasons, and then progress onto standard handles later on in phase 2 and 3.
Here’s the main reason:
It reduces pain symptoms — which allows you to strengthen shoulder abduction without being held back or limited by pain.
Which then means you can progress:
And move onto more complex movements when you’re stronger.
How do cuffs reduce pain?
When you place the cuff at your elbow, you reduce the “lever length”. The distance between your shoulder and your elbow (cuff) is less compared to your shoulder and your wrist (handle).
This reduces momentum or “inertia”.
GO TRY IT NOW
I’ve shown you the exercise, how to do it and the “why” behind it.
Now you can try it for yourself.
Here’s how:
First — perform a warm up set with light weight (approx 50% of your working set), and do 8 repetitions.
This will help lubricate the joint, and “wake up” your muscles.
Then — perform a working set for 8 reps.
For all reps, warm up and working, I want you to respect a strict tempo. Three seconds up, three seconds down, with a one second pause at the top, and at the bottom.
Why?
This gives everything around the joint a chance to contract.
And it completely eliminates the likelihood of you “swinging” or cheating, which means you’ll maximise stimulus to your muscles, while reducing pain and risk of further injury.
OTHER EXAMPLES

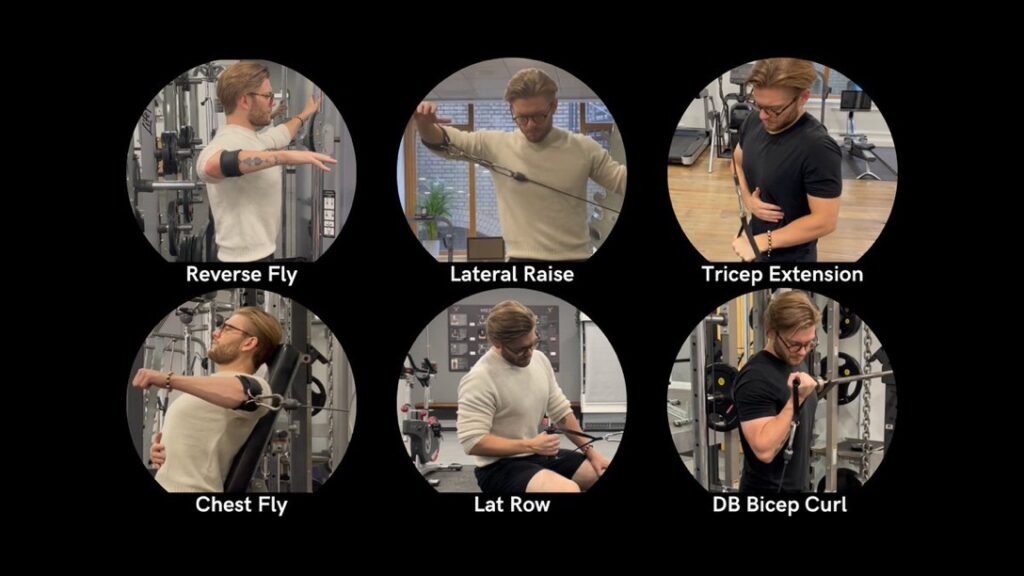
This is one of many exercises I use with clients in phase 1 to reduce pain and fully restore shoulder function.
Alongside abduction (lat raises)…
We also target:
Flexion
Extension
Adduction
Horizontal flexion
Horizontal etension
External rotation
Internal rotation
We also look at the scapula (shoulder blade), and train elevation, depression, protraction and retraction.
These single joint movements make up phase 1.
And in phase 2 — when we’ve rebuilt your shoulder mobility and strength — we use multi-joint lifts (machines and free-weights).
For more info
Now as you can see, a lot of precision goes into setting up, and executing these exercises.
It’s not just about:
”Do 3 x 8 lat raises and hope for the best”
The cable height must be right.
The lifting speed must be right.
The equipment must be right.
The cuff placement might be right.
The session frequency must be right.
And we haven’t even discussed session or program progression.
If you’d like to remove the guess work, and learn more about how I create shoulder programs to help clients resolve their shoulder issues when nothing else works…
Click here and email me “LAT RAISE” — and we’ll have a chat.


